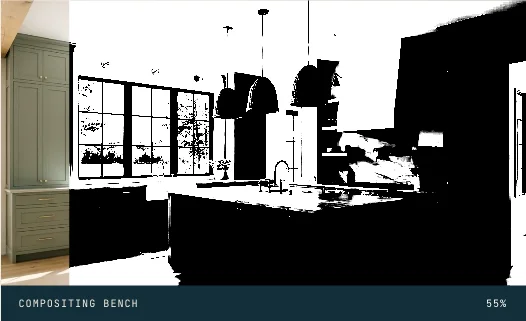
A luminance threshold separates bright features from the rest of the photograph. The source remains visible alongside the mask.
IN EVERYDAY WORDS
Raise the threshold. Compare the two ends of the control, then replay the change.
The look
A luminance threshold separates bright features from the rest of the photograph. The source remains visible alongside the mask.
Say this to a designer
Apply “Threshold the highlights” to my composited property image. A luminance threshold separates bright features from the rest of the photograph. The source remains visible alongside the mask.
Direct the motion
These are starting points, not fixed rules. Match the timing to the content and the person using it.
trigger
Scroll through the study or adjust “Raise the threshold” directly.
entrance
Begin with the identifiable state “Broad light regions”.
path
A luminance threshold separates bright features from the rest of the photograph. The source remains visible alongside the mask.
timing
Scrub to inspect the change, then use replay to see the sequence in time.
easing
Match the illustrated motion. Keep manual seeking directly coupled to the control.
hold
Hold the resolved state “Highest highlights” long enough to inspect its defining detail.
exit
Carry the subject into the next exhibit and keep the saved project selection.
The vocabulary
Compositing
Separate visual contributions are combined to create the visible result.
Make it fit your project
Good places to use it: composited property image.
Use this reference to recreate the change from “Broad light regions” to “Highest highlights”.
Watch for: Keep the primary subject and its original meaning recognizable throughout the change.
When motion is off: Select “Broad light regions” or “Highest highlights” to inspect a still state. The same control works from the keyboard.
Implementation and accessibility
Use “Raise the threshold” to move from “Broad light regions” to “Highest highlights”.
A luminance threshold separates bright features from the rest of the photograph. The source remains visible alongside the mask.
Check the beginning, midpoint and end at phone size. Replay the result and reverse the control.
Give the control a persistent name. Provide both endpoint descriptions and a keyboard equivalent.
Mount the active study on demand and release it after the visitor leaves.
Replace [ELEMENT] with the part of your project you want to change. The prompt includes the design brief, motion direction, definitions, and implementation steps.
Read the full prompt
Use AI Acceleration Design Ref #470 (Threshold the highlights, version 1) on [ELEMENT] in my existing project.

Permanent reference: https://aiacceleration.ai/designrefs/470. This local brief contains the full definition. Inspect my existing stack, component, design tokens and interaction before editing.

Goal: A luminance threshold separates bright features from the rest of the photograph. The source remains visible alongside the mask.

DESIGN REF #470 · Threshold the highlights

In everyday words: Raise the threshold. Compare the two ends of the control, then replay the change.

The look: A luminance threshold separates bright features from the rest of the photograph. The source remains visible alongside the mask.

Say this to a designer:
Apply “Threshold the highlights” to my composited property image. A luminance threshold separates bright features from the rest of the photograph. The source remains visible alongside the mask.

Motion direction (starting points to adapt):
Trigger: Scroll through the study or adjust “Raise the threshold” directly.
Entrance: Begin with the identifiable state “Broad light regions”.
Path: A luminance threshold separates bright features from the rest of the photograph. The source remains visible alongside the mask.
Timing: Scrub to inspect the change, then use replay to see the sequence in time.
Easing: Match the illustrated motion. Keep manual seeking directly coupled to the control.
Hold: Hold the resolved state “Highest highlights” long enough to inspect its defining detail.
Exit: Carry the subject into the next exhibit and keep the saved project selection.

Design vocabulary:
Compositing: Separate visual contributions are combined to create the visible result.

Reduced motion: Select “Broad light regions” or “Highest highlights” to inspect a still state. The same control works from the keyboard.

Implement:
1. Use “Raise the threshold” to move from “Broad light regions” to “Highest highlights”.
2. A luminance threshold separates bright features from the rest of the photograph. The source remains visible alongside the mask.
3. Check the beginning, midpoint and end at phone size. Replay the result and reverse the control.

Adapt the reference to my branding and content. Preserve existing functionality and semantic HTML.
Reduced motion: Select “Broad light regions” or “Highest highlights” to inspect a still state. The same control works from the keyboard.
Accessibility: Give the control a persistent name. Provide both endpoint descriptions and a keyboard equivalent.
Performance: Mount the active study on demand and release it after the visitor leaves.
Avoid: Keep the primary subject and its original meaning recognizable throughout the change.

Show me the working result, verify keyboard, mobile, loading/error and reduced-motion behavior, and explain any tradeoff. Do not publish or change unrelated elements.
Permanent reference #470 · version 1. Pairs with #004, #006.